| Embedding Pushdata charts | This article introduces the new chart embedding feature of pushdata.io, and explains how to use it to display your time series data charts on your own site with a minimum amount of work. |
Charts, charts charts!

Viewing charts on pushdata.io isn't as cool as being able to show them on your own site/blog/whatever, so we built a neat little feature that allows you to do the latter without a lot of hassle.
Basically, it works the same as many other systems out there that can create embeddable content, like Youtube or Google maps or similar sites. The steps are:
- Store some time series data on pushdata.io
- Go to your pushdata.io dashboard and select the time series you're interested in
- Click a button at the bottom of the page to get an "Embed URL" for your time series chart
- Put that URL inside an <iframe> tag in your HTML
- Done!
Below we'll go through the new steps (3 and 4) in a bit more detail

Getting the Embed URL
On your user dashboard (https://pushdata.io/youremail@yourdomain.com) you get a list of all your time series, and can select one of them in order to view the data in a chart at the bottom of the page.
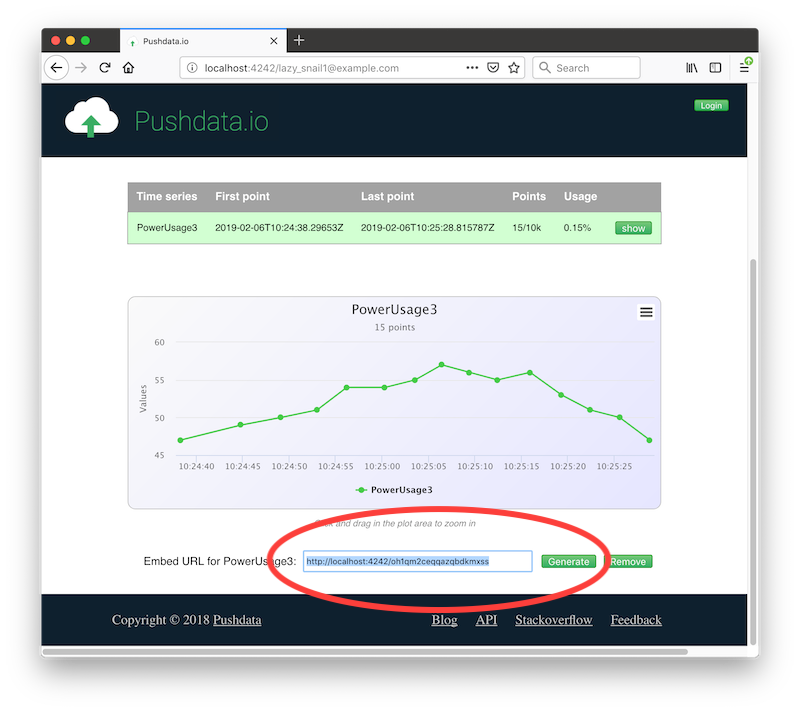
If you select the time series you're interested in, you'll see the chart with the data and below it, at the very bottom of the page contents, there will be a line that says "Embed URL for [yourtimeseriesname]", followed by a text box that says "none". On the right side are two buttons - one with the text "Generate" and one that should be disabled and which has the text "Remove".
Clicking the "Generate" button will generate a new Embed URL for this chart. The Embed URL will be displayed in the text box, from where it can be copied and then used in the HTML on your own web page.
Using the Embed URL
When you have the Embed URL you can put it inside an <iframe> tag in your HTML, in order to embed the chart on your page.
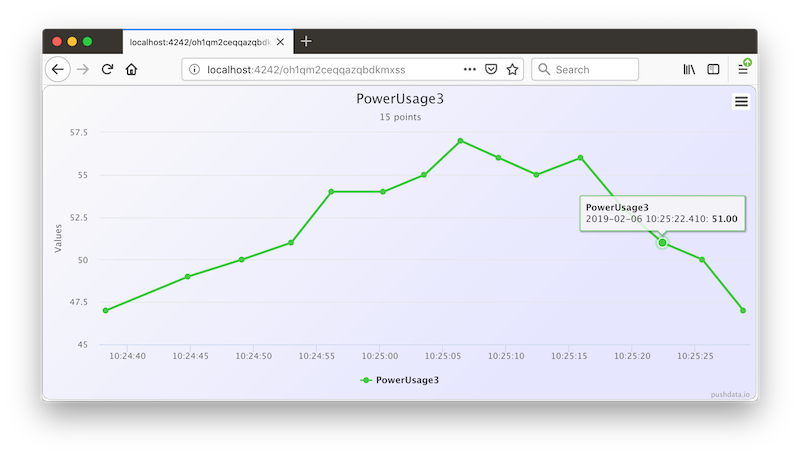
To the right is an example of an embedded chart: it is a live chart - i.e. generated on every page load - showing the number of new pushdata.io accounts in the past week (updated daily).
To not make you have to look at the source for this page, here is the iframe tag that is used to embed the chart on this blog page:
You can stop reading here and go try it out, if you feel like it. The rest is just extra info/reference stuff.
Embed URLs are public
The Embed URLs you create and use on your own pages are publicly accessible. That is, even if you have switched on Security for you account (it's a toggle you can access from the user dashboard), anyone who knows one of your Embed URLs will be able to use it to read data from that particular time series.
To sum up the security considerations:
- Embed URLs are unique to a specific time series, meaning each URL can only be used to access data for one particular time series.
- Anyone who knows the Embed URL will be able to access the data for that time series.
- An Embed URL can only be used to read data from the associated time series. The URL can not be used to modify the time series in any way - i.e. not add data, delete data, or delete the time series.
- The Security setting for your account does not affect Embed URLs - they will work regardless of whether security for the account is toggled on or off.
- A time series can only have one single Embed URL associated with it, or none at all.
Worth noting, perhaps, is that if Security for your account has not been enabled, all your time series are accessible (and possible to modify!) by anyone who can guess which email address you're using when storing data on pushdata.io.
This means that if you're at all concerned about security, you should toggle it to On for your account immediately.
Enabling Security for your account
If the Security control on your user dashboard is disabled and can't be toggled, it is because you haven't logged in using your API key (verifying to pushdata.io that your email address is valid and that you are who you claim to be).
When you start storing data on pushdata.io an account is created automatically, and an email containing your API key is sent to the email address you used when storing data.
The email also contains a login link that can be clicked to get logged on using the API key. You can also click the "Login" button in the upper right corner on pushdata.io, and login using just the API key itself.
When you're logged on you can change the security setting for the account.
Did you register using a fake email?
We've got this covered too!
You can go to the user dashboard (https://pushdata.io/youremail@yourdomain.com) and change the address of an account without Security enabled. This means a new API key will be generated and then sent out in an email to the new address.
Comments: